Skip to content
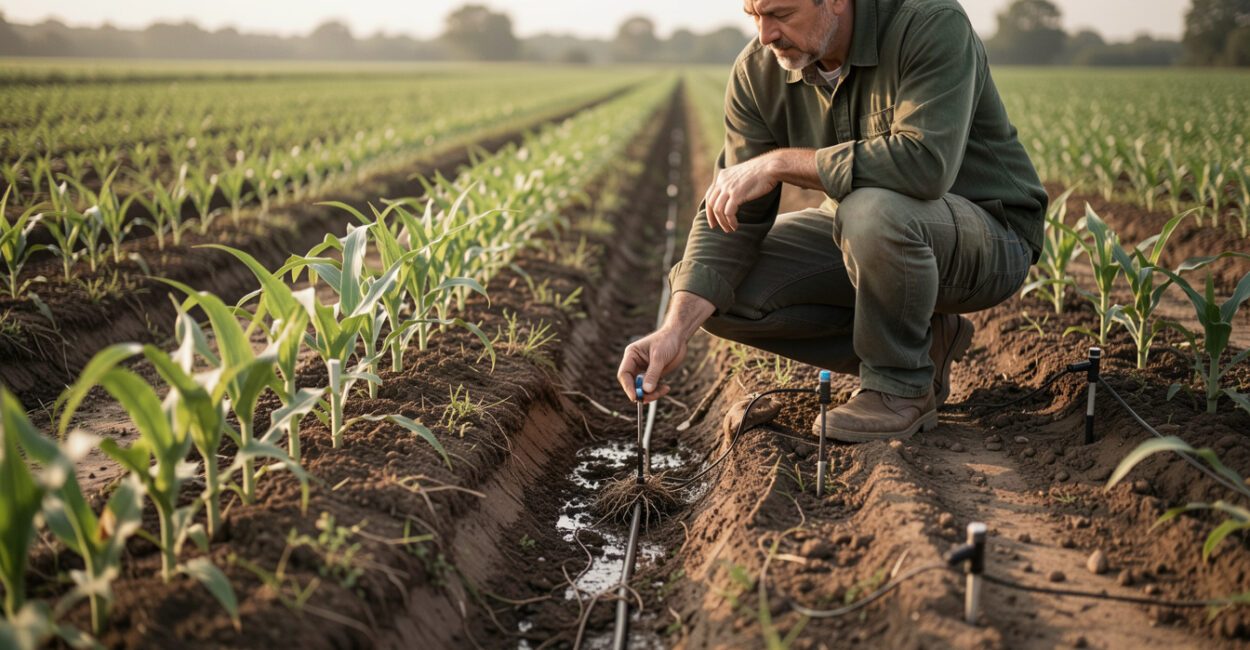
A probe can report a wet root zone while the crop a few feet away is short on water. That is why sensor placement matters: the reading is only useful if the probe sits in soil and irrigation conditions that represent the plants you are managing.
For a small, variable field, choose monitoring locations by soil type, crop, and irrigation pattern, then place sensors at depths that match the active root zone. A single location rarely represents the whole field. Start with the zone that best reflects the crop’s typical conditions, and add locations where soil or water delivery differs.
What Should Sensor Placement Help You Decide?
Soil-moisture sensor placement should produce readings that help you judge water availability in the crop’s active root zone, the soil volume where most water uptake occurs. In everyday terms, the probe should track the soil the crop is relying on, not a convenient spot with unusual moisture.
Before installing anything, name the decision the reading will support: whether to irrigate a zone, whether water is reaching the deeper root area, or whether a field section is drying faster than expected. A probe cannot answer all three questions from every position. The aim is a reliable signal for a specific management area.
A soil-moisture reading represents the soil around the probe, not the whole field.
That distinction matters on small farms, where a short distance can cross a soil boundary, a slope, or a change in irrigation coverage. The role of irrigation software in organizing field data begins with measurements tied to meaningful zones.
How Should a Small Field Be Divided Into Monitoring Zones?
Divide the field wherever soil, topography, crop, or water delivery could change how quickly the root zone wets and dries. One zone may be enough for a uniform bed; a field with contrasting soils or irrigation layouts may need several.
Walk the field and map practical differences before choosing sites. Look for changes in texture, slope, drainage, crop vigor, and irrigation equipment. Soil maps and a soil test can help identify patterns, but they do not replace checking conditions at the scale of the crop rows.
- Soil: Separate areas that differ in texture or drainage, since they can hold and release water differently.
- Landscape: Treat low spots, slopes, and raised areas as separate candidates if water moves or accumulates differently.
- Management: Split areas with different crops, planting dates, irrigation schedules, or emitter arrangements.
Avoid defining a zone around a single odd patch unless that patch is large enough to manage on its own. A compacted wheel track, leaking connection, or unusually vigorous plant may deserve investigation, but it should not stand in for a larger area.

Where Should Soil Sensors Go Within Each Zone?
Choose a spot that reflects the typical crop and soil conditions within the zone, with healthy plants and normal irrigation coverage nearby. Avoid field edges and isolated extremes unless the purpose is to monitor those conditions specifically.
Place the probe where roots are active and water distribution is representative. Do not install it in a wheel track, a headland, a low pocket that stays saturated, or a dry ridge simply because the spot is easy to reach. Those locations can be useful for diagnosing a problem, but they answer a different question.
For example, a small vegetable field may have a sandy upper bed and a heavier lower section. A probe in the lower section could remain wet long after the upper beds need water, so each area may need its own monitoring point if they are irrigated together but dry at different rates.
Read also: Solar-Powered Soil Sensors: Reliable Data Off-Grid
Complete guide: Soil Sensors for Small Farms: Cut Irrigation Costs
Keep a simple record of each location: crop and variety, row position, soil zone, installation depth, and distance from the nearest emitter. That context helps explain a reading months later, when the crop canopy makes the probe hard to find.
How Deep Should a Soil-moisture Probe Be Installed?
Install sensors at depths that sample the crop’s active root zone, rather than choosing one standard depth for every crop. A shallow sensor shows how quickly the surface layer dries; a deeper sensor helps show whether water is reaching the lower roots or moving below them.
For a multi-sensor probe, place sensing elements at more than one depth across the rooted profile. For separate probes, select depths based on the crop’s rooting pattern, soil layers, and the decision you need to make. A shallow-rooted crop and a deep-rooted crop can require very different monitoring profiles.
Rooting depth changes with crop stage, soil compaction, and restrictive layers. Young plants may draw mostly from shallow soil, while mature crops can use moisture deeper down. The USDA Natural Resources Conservation Service provides soil and conservation resources that can help growers understand how site conditions shape water movement.
There is no universally correct depth: roots may not reach their potential depth in compacted or waterlogged soil, and soil texture changes how far an irrigation event moves. Treat depth recommendations as a starting point, then confirm them against crop development and observed wetting patterns.
How Far Should a Sensor Be from a Plant or Drip Emitter?
Place the probe within the crop’s active root area and in the portion of the wetted zone that represents typical water access. The right distance from a stem or emitter depends on crop spacing, emitter flow, soil texture, and the shape of the wetted area.
A sensor directly beneath a drip emitter may read wetter than most roots experience, particularly in coarse soil where water moves downward in a narrow column. Farther away, the probe may sit outside the wetted zone and make irrigation look ineffective. Positioning near the edge of the active wetted area can help track whether water reaches the broader root zone, but that position must be checked in the field.
With overhead irrigation, consider sprinkler overlap and coverage patterns. A probe directly under a sprinkler or in a consistently sheltered strip may capture an unusual dose. The University of Minnesota Extension offers irrigation and soil-water guidance that can help frame site-specific decisions.
When unsure, compare a probe near the emitter with one farther into the wetted root area for a few irrigation cycles. The difference between them often reveals more than a generic distance recommendation.
How Can You Tell If an Installation is Giving Misleading Readings?
A location may be misleading if its readings do not fit the soil, crop, or irrigation event around it. Look for persistent disagreement with nearby conditions, not just one surprising value.
Installation quality matters. Air gaps around a probe, poor contact with the soil, a bent sensor, or a disturbed installation hole can distort readings. Follow the manufacturer’s installation method, keep the sensing elements in firm contact with undisturbed soil, and avoid smearing or compacting the probe wall during installation.
After irrigation or rainfall, check whether the reading changes in a plausible sequence for that soil and depth. If a shallow sensor responds but a deeper one does not, water may not have reached the lower profile. If a probe remains wet while nearby plants wilt and the soil around their roots feels dry, reassess its position, contact, and calibration.
The U.S. Department of Agriculture provides general soil and agriculture resources, but sensor interpretation still depends on the instrument type and the soil in contact with it. Capacitance probes and tensiometers, for example, measure different properties, so their values should not be interpreted as interchangeable.
Should a Small Farm Use One Sensor or Several Locations?
Use more than one monitoring location when meaningful differences in soil, crop, terrain, or irrigation could change water availability. One well-placed site can guide a uniform block; it cannot reliably represent separate management zones that dry at different rates.
Start with one representative site in each zone you manage differently, then add a second location where uncertainty is high or the consequences of a missed irrigation are significant. If budget limits the number of probes, prioritize contrasting zones over placing several probes close together in the same uniform bed.
Readings should be compared across depths and locations, then checked against field conditions. If one site repeatedly behaves unlike the rest, determine whether it marks a real management issue or an unrepresentative position. Update the map when crop rows, irrigation hardware, or management zones change.
For a broader view of how sensor readings fit into water management, compare placement decisions with the principles in this guide to smart irrigation systems on farms. The best next step is a field check: mark each probe, record its depth and nearby emitter position, then compare its response after the next irrigation.
| Question | Short answer |
|---|---|
| Where should a probe go? | In a representative crop and soil zone with normal water delivery. |
| How deep? | At depths that sample the crop’s active root zone and the decision at hand. |
| How close to a drip emitter? | Within the wetted root area, verified against the actual wetting pattern. |
| One location or several? | Use at least one per distinct management zone; add locations where variability matters. |
| What signals a poor location? | Readings that conflict persistently with nearby soil, crop response, or irrigation events. |
Can a Probe Be Moved After Installation?
Yes. Move it when crop rows, irrigation equipment, or the intended management zone changes, or when checks show the site is unrepresentative. Record the new depth and position, since readings from the old and new locations may not form a continuous series.
Should Sensors Be Installed Before or After Planting?
Install them when you can access the soil without damaging the crop, and before readings are needed to guide irrigation. Pre-plant installation can make it easier to place probes accurately, while post-plant installation may better reflect the established root zone.
Do All Sensor Types Need the Same Installation Method?
No. Capacitance probes, time-domain reflectometry sensors, and tensiometers differ in what they measure and how they contact soil. Follow the specific instrument’s instructions and use a consistent interpretation method.
How Often Should Placement Be Checked?
Inspect locations when field conditions change, such as after tillage, emitter repairs, or a shift in crop rows. Also revisit any probe whose response no longer matches irrigation events or crop conditions.